Desmos can solve an equation in seconds. The harder SAT skill is knowing that the equation belongs in Desmos, entering it without changing its meaning, and submitting the exact value the question asked for.
That judgment is what real calculator fluency looks like. It is not a list of tricks to memorize. It is a solving system.
- 01. Recognize
- Name the mathematical task before touching the calculator.
- 02. Represent
- Translate every condition without changing its meaning.
- 03. Read
- Identify the point, parameter, value, or pattern that matters.
- 04. Answer
- Return the exact quantity and format the SAT requested.
- 05. Verify
- Check the setup, result, and method choice before moving on.
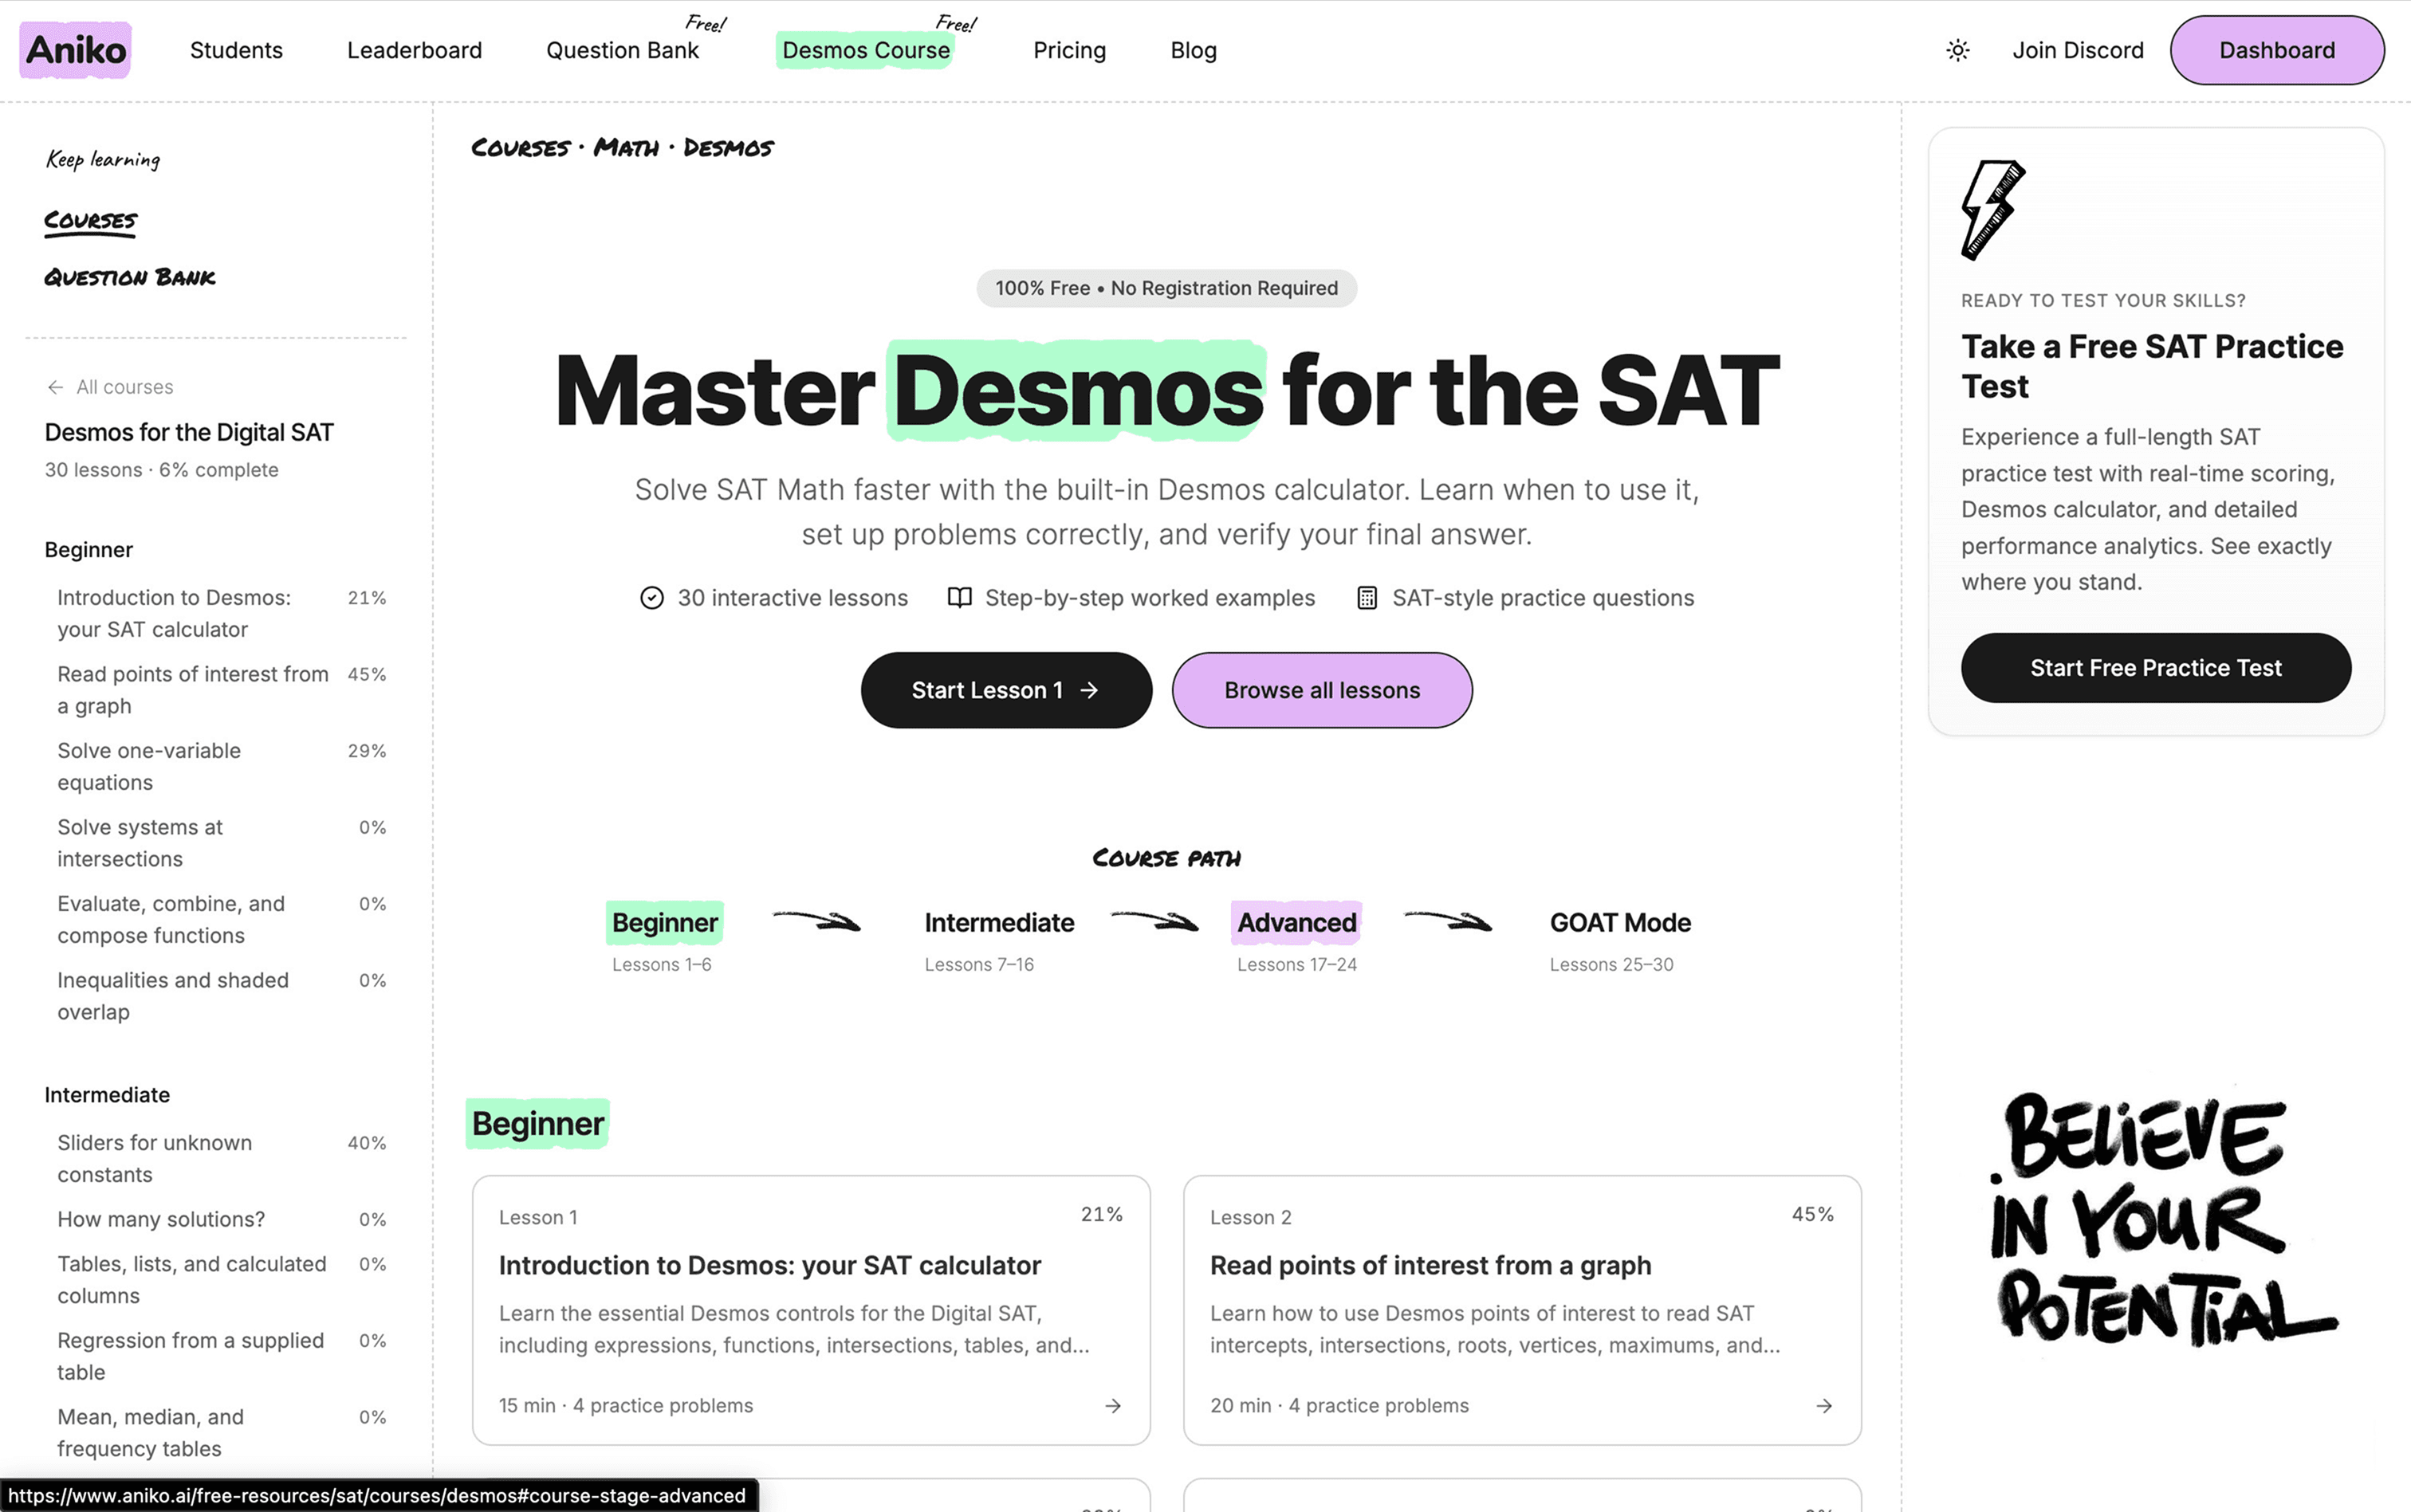
We built the Aniko Desmos Course to teach that complete process. It has 30 interactive lessons, organized from Beginner through Intermediate and Advanced to GOAT Mode. Every lesson is free and open to everyone, with no registration required.
The best way to learn Desmos for the SAT is to learn one reliable workflow at a time, use it inside the calculator, apply it to SAT-style questions, and compare it with the fastest hand method. This guide shows you the complete path.
Desmos is a solving method, not a bag of tricks
Desmos is one of the biggest advantages available on Digital SAT Math. You can use it to solve equations and systems, read important points from graphs, evaluate functions, organize data, fit regression models, test answer choices, and complete calculations that would be slow or fragile by hand.
But the calculator does not decide what the problem means.
A student can know that intersections solve systems and still select the wrong point. They can fit a perfect regression to data that only supports a line of best fit. They can find the correct intersection and submit the wrong coordinate. They can trust a rounded decimal when the answer choices require an exact expression.
In each case, Desmos did exactly what it was told to do. The mistake happened before or after the calculation.
That is why every strong Desmos solution follows the same five-part process.
1. Recognize the task
Look for the mathematical job before touching the calculator.
Is the question asking you to solve, locate, compare, model, test, or calculate? An equation, graph, table, set of points, or function is often a strong signal that Desmos may give you a fast path.
2. Represent every condition
Translate the prompt into equations, functions, points, tables, restrictions, or regression parameters without changing its meaning.
Parentheses, variables, domains, and units matter. Entering most of the information correctly is not enough. Every condition that affects the answer has to survive the translation.
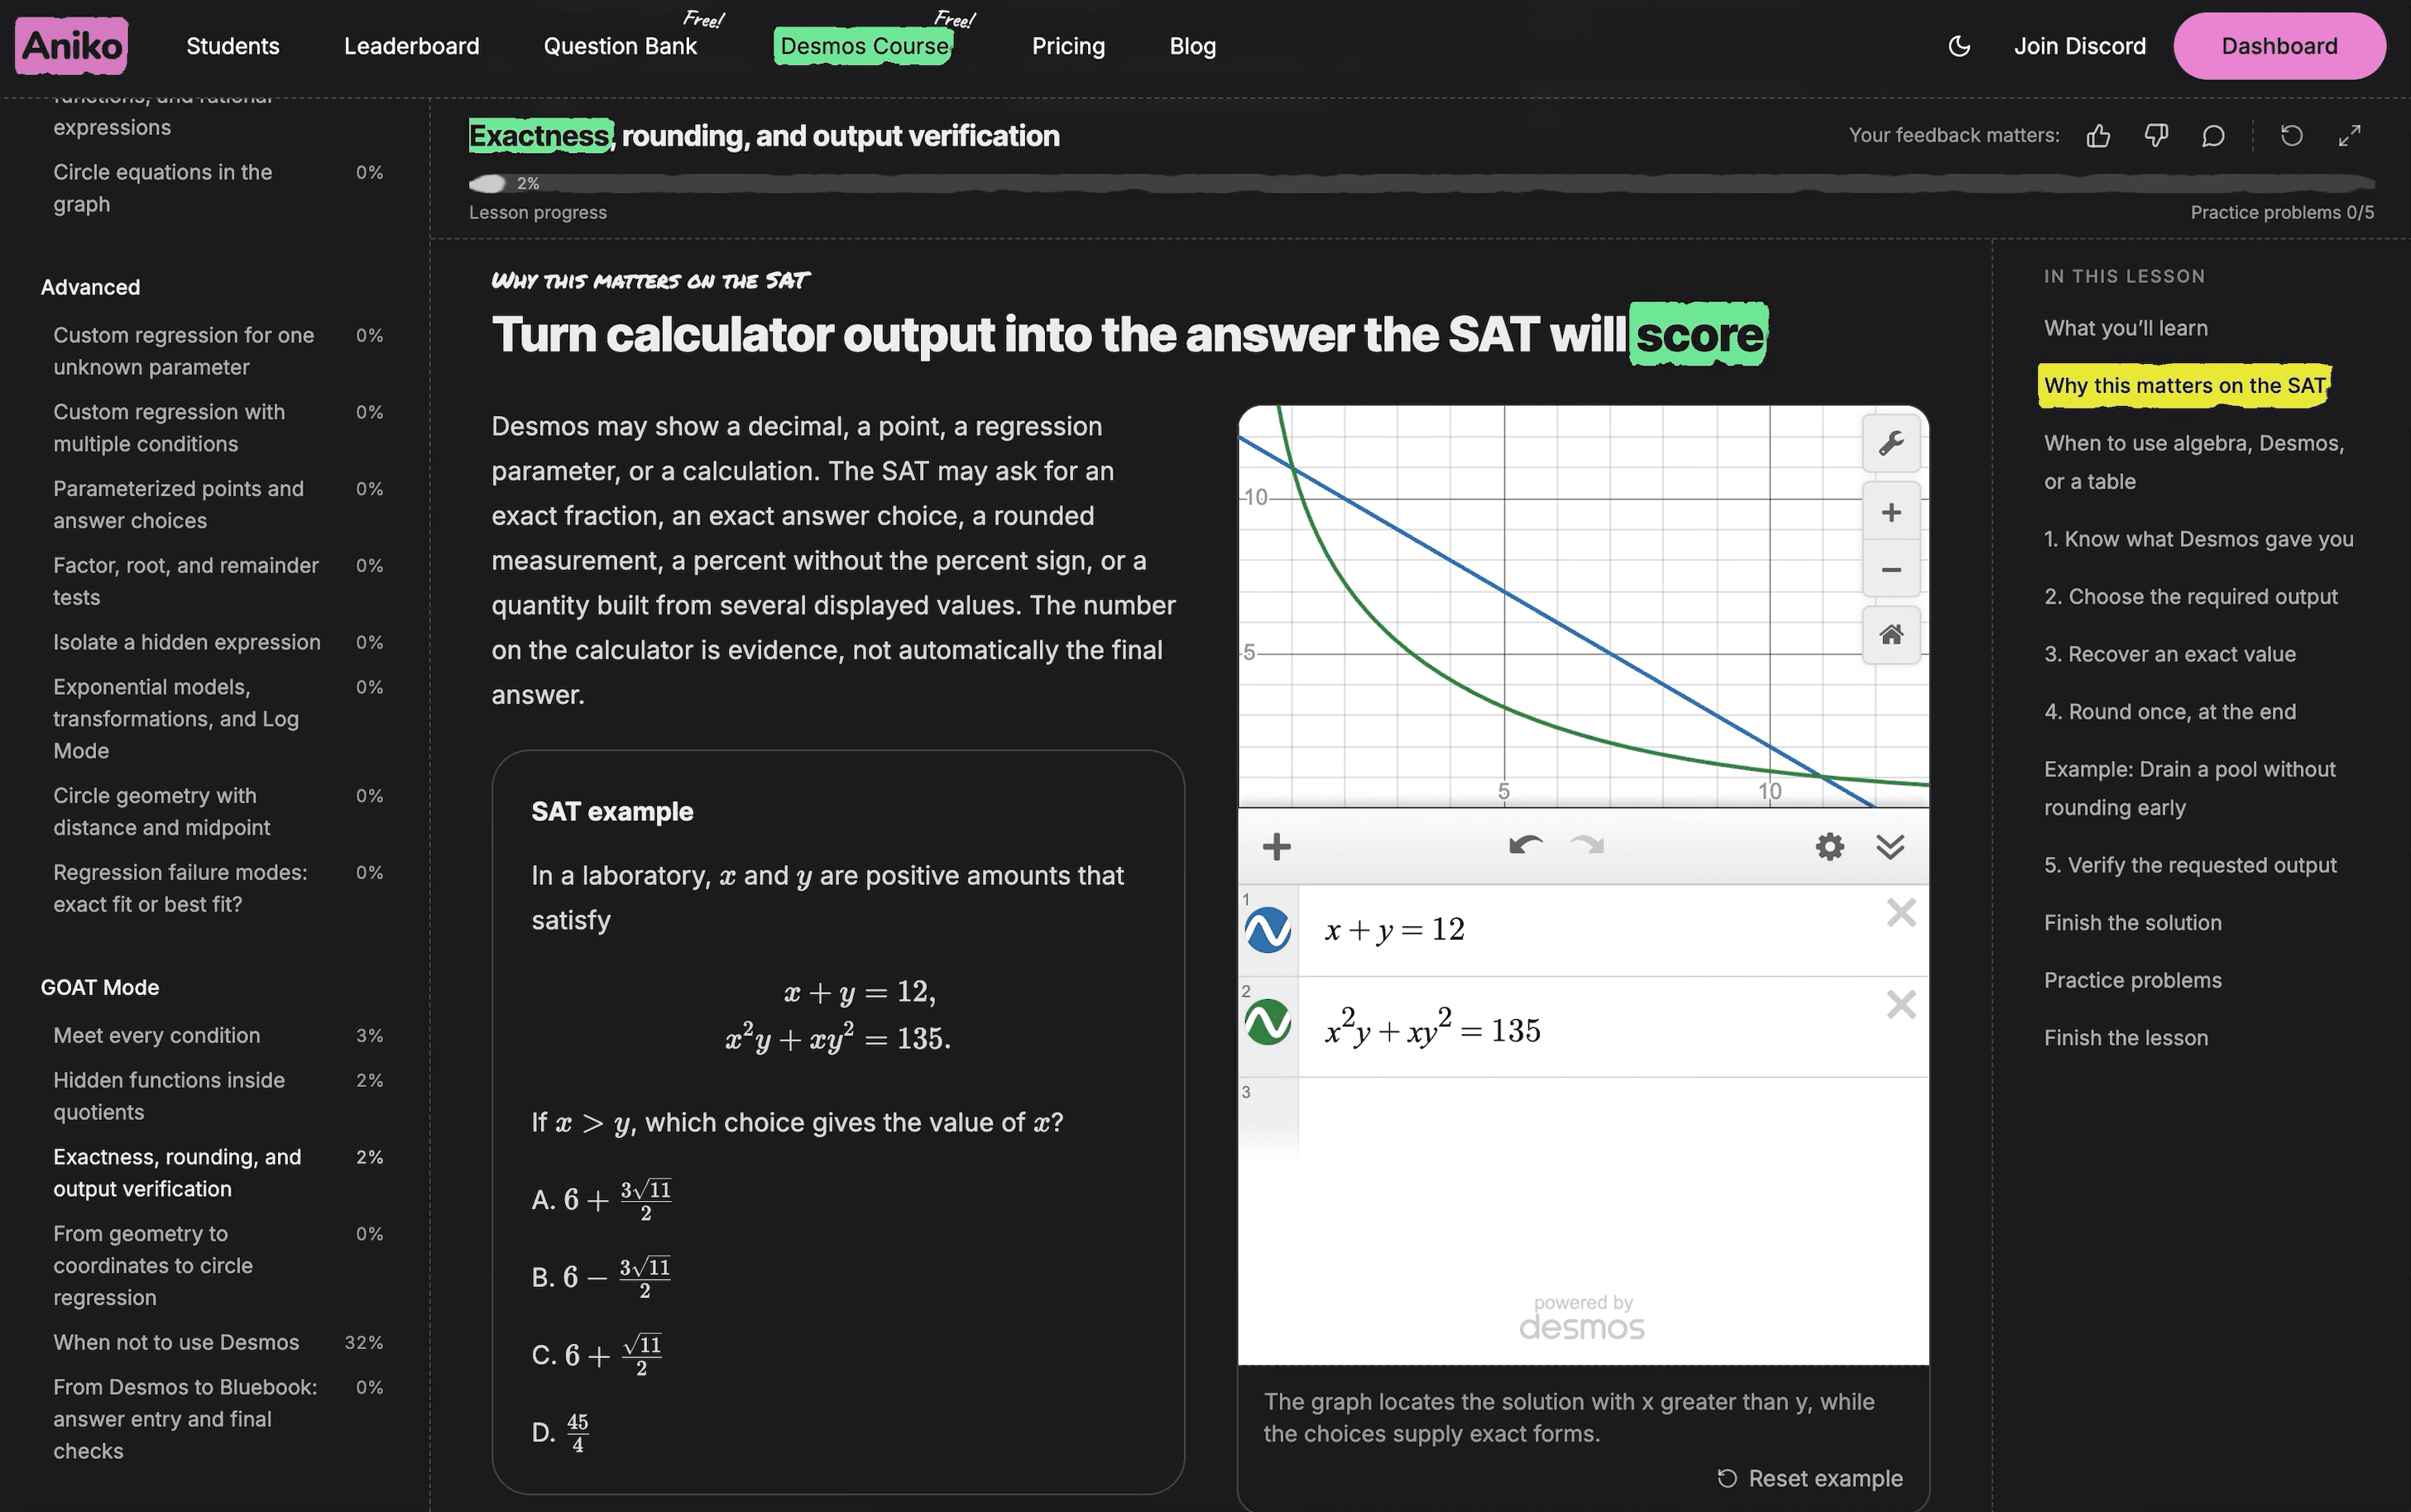
3. Read the relevant result
An intersection may show both coordinates when the question asks for one. A regression may return several parameters when the SAT asks for a combination of them. A graph may show a decimal approximation when the choices use exact forms.
The number on the screen is evidence. It is not automatically the final answer.
4. Answer what the question asked
Return to the final sentence of the prompt. Identify the requested variable, coordinate, expression, unit, percentage, or rounded quantity. Then turn the calculator result into a valid SAT response.
5. Verify the method
Check that the calculator setup matches the original problem and that the result satisfies its conditions. Then ask one more question: was Desmos actually the clearest and fastest method?
Sometimes the answer is no. A one-step calculation, an obvious algebraic cancellation, or a familiar geometry theorem may finish the problem before you could type it. Calculator fluency includes recognizing those moments.
Learn Desmos by doing the complete solution
Reading a list of commands can make Desmos feel familiar. It does not make the method reliable.
Reliable skill comes from completing the entire path yourself: recognizing the technique, building the setup, reading the output, submitting an answer, and understanding the mistake if the answer is wrong.
Each Aniko lesson is built around that progression.
Begin with the decision
A lesson first explains why the technique matters, how to recognize the questions where it applies, and when another method may be faster.
This is important because the same mathematical topic can invite different approaches. One system may be easiest to graph. Another may collapse after one line of elimination. The goal is not to force every question into Desmos. It is to make the best opening decision quickly.
Work inside the calculator
The Desmos Graphing Calculator is embedded directly in the lesson. You can change expressions, create tables, select points, test conditions, and inspect outputs without moving between a tutorial and a separate calculator tab.
The calculator is configured around the current SAT Graphing Calculator, and your own calculator work is saved on your device.
Apply the idea before seeing the solution
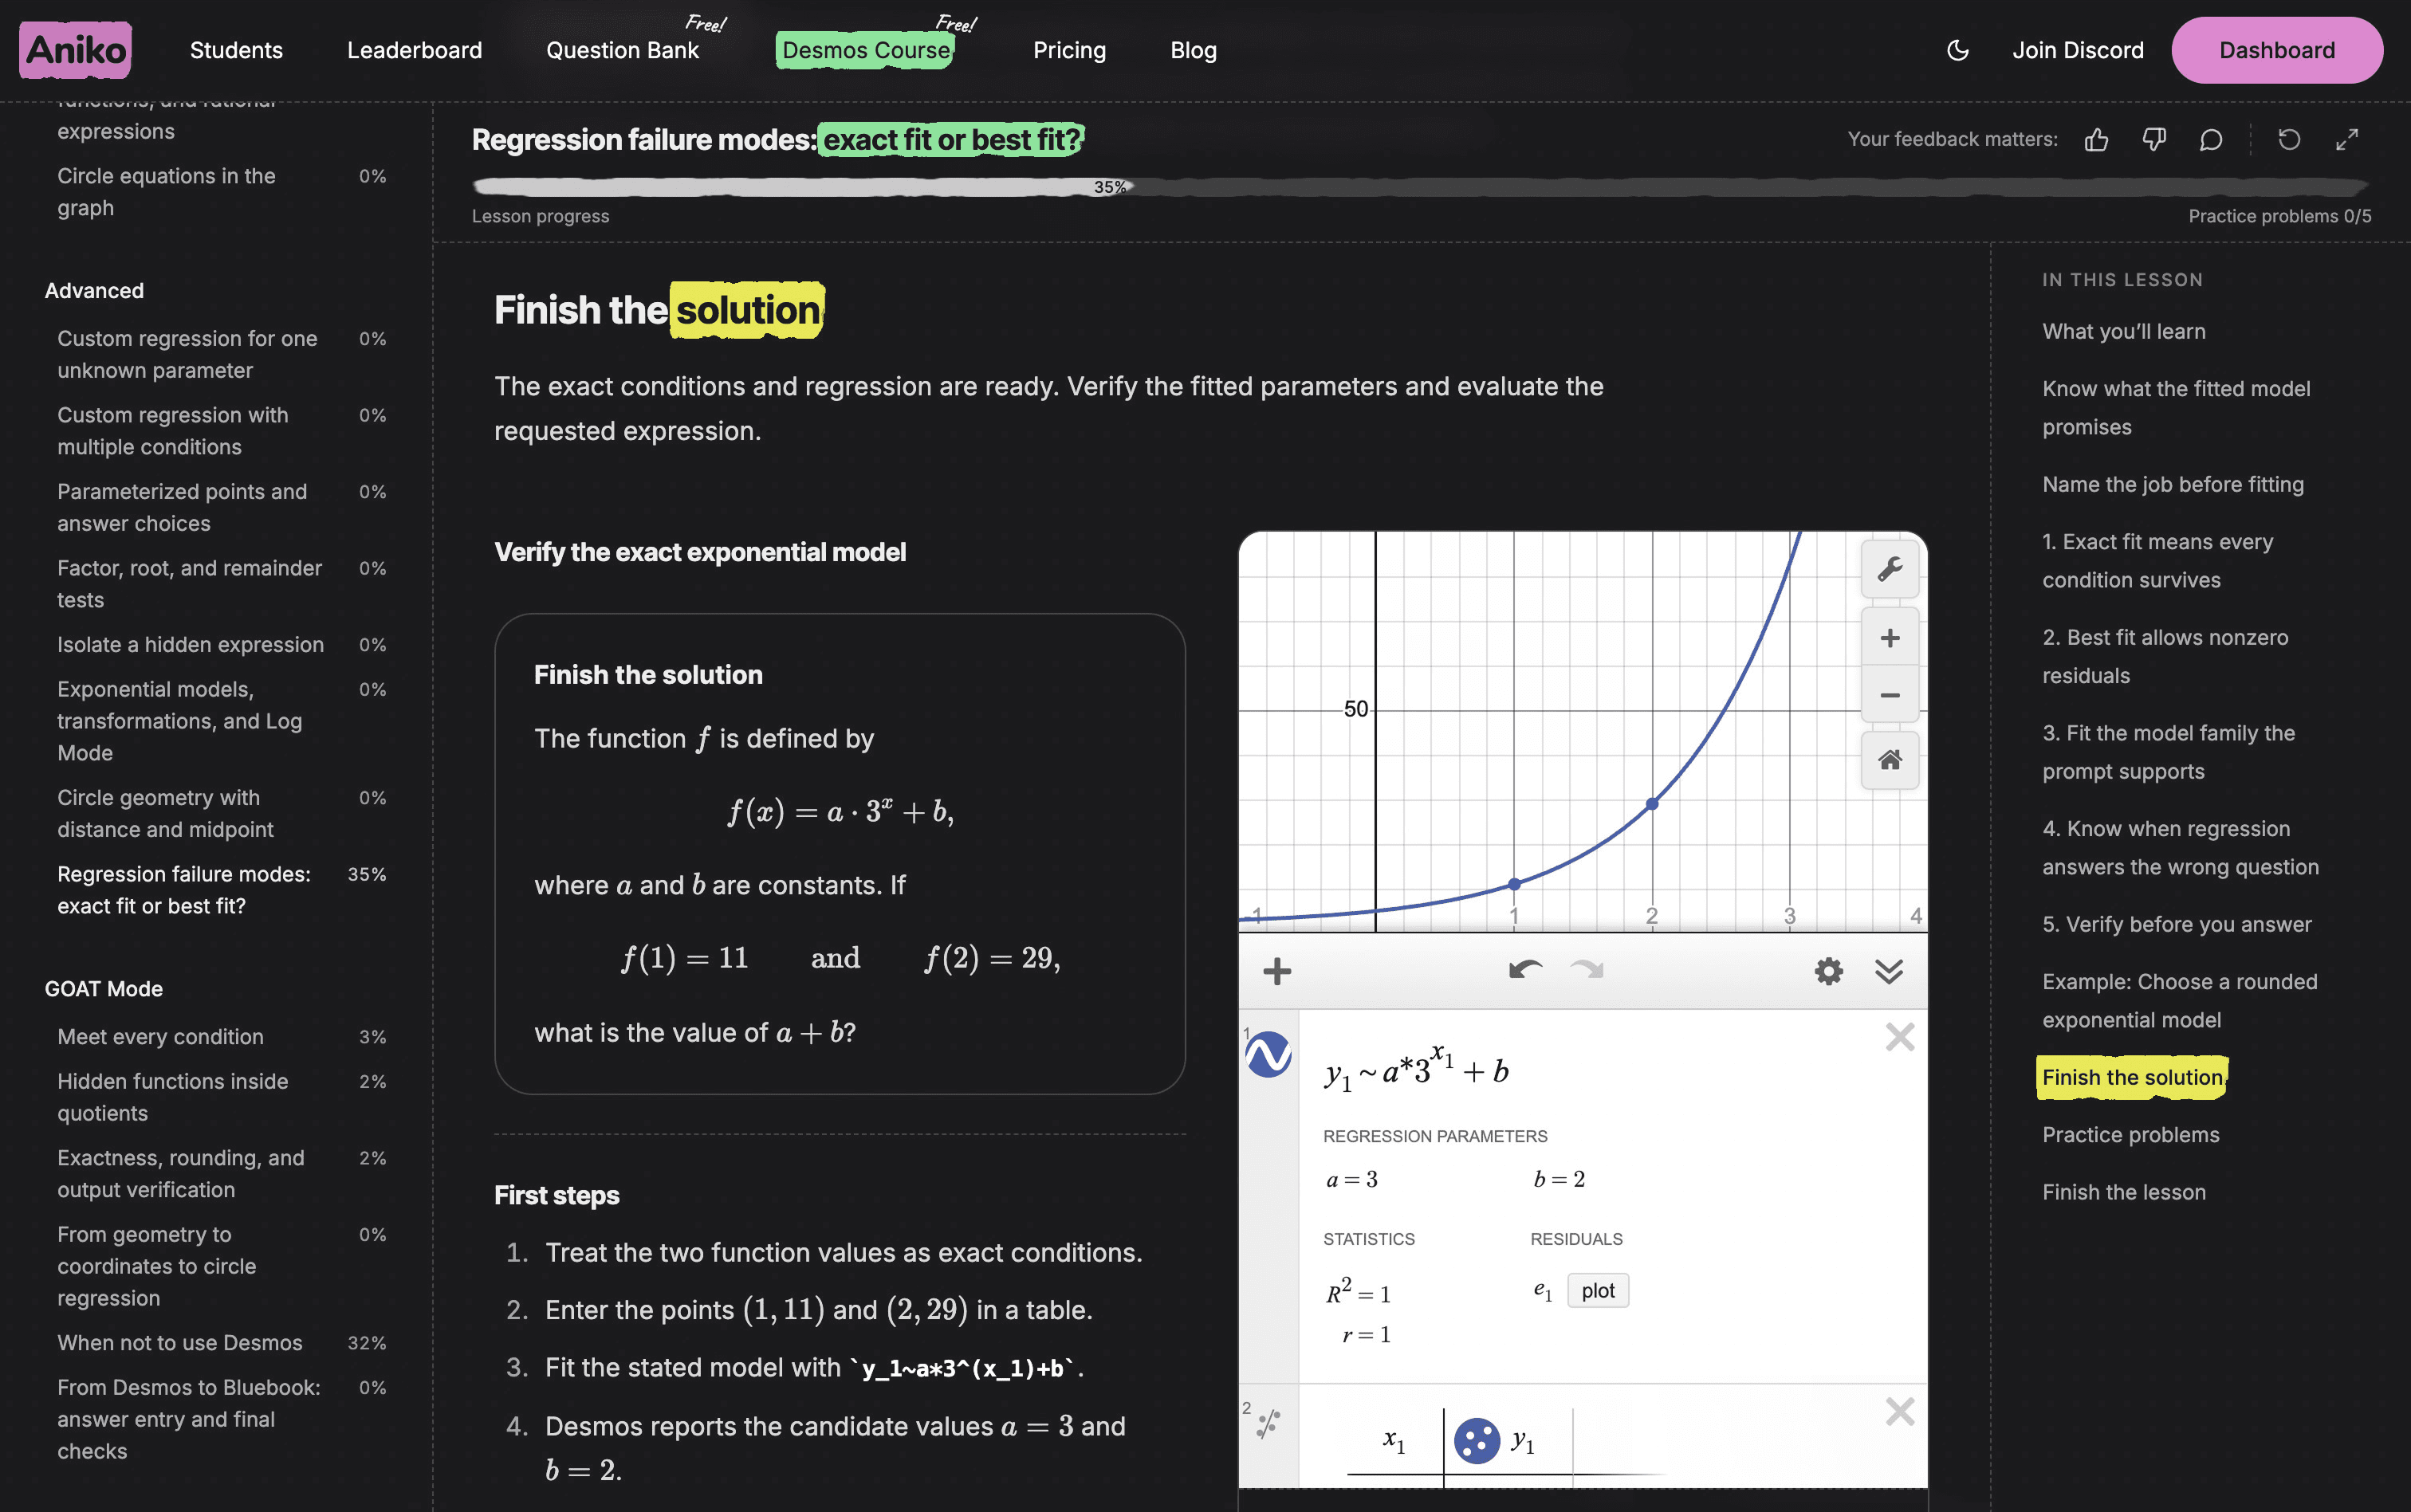
Short checks ask you to compare methods or diagnose a setup. Guided examples break down problems that need a more deliberate sequence. Then Finish the solution gives you the setup or the first steps and asks you to complete the SAT-style answer yourself.
Hints remain available while you work, but scored answers are not revealed. You continue until the answer is correct, then the full solution and common error become available.
Prove the method on fresh problems
Every lesson ends with authored SAT-style practice that moves from direct application toward variation and transfer. Related links then take you to free SAT Math Question Bank practice, where you can meet the same mathematical skill in new forms.
That final step matters. Following a worked example proves that the explanation was clear. Solving a fresh problem proves that the method belongs to you.
The four stages of SAT Desmos mastery
The 30 lessons follow one fixed progression:
These stages describe calculator sophistication, not SAT question difficulty. A simple-looking problem can punish an inaccurate setup. A hard problem can become manageable once its structure is represented clearly.
Beginner: build reliable control
The six Beginner lessons establish the habits that every later technique depends on.
You learn to:
- enter expressions and equations without changing their structure;
- graph equations directly instead of rearranging them first;
- read intercepts, intersections, roots, vertices, maxima, and minima;
- solve one-variable equations and systems;
- define, evaluate, combine, and compose functions; and
- interpret inequalities and shaded overlap.
The first lesson also teaches method choice from the beginning. Desmos should become one of your first considerations when a problem asks you to solve, locate, compare, model, test, or calculate. It should not become an automatic response to every Math question.
If you have never used Desmos seriously, begin with Introduction to Desmos: your SAT calculator. It covers the essential controls, accurate expression entry, functions, intersections, tables, angle mode, and the habit of clearing unrelated work before a new problem.
Intermediate: turn information into models
The ten Intermediate lessons move beyond single equations. You begin organizing information and asking Desmos to expose a relationship.
The stage covers:
- sliders for unknown constants;
- solution counts and tangency;
- tables, lists, and calculated columns;
- regression from supplied data;
- mean, median, frequency tables, spread, and standard deviation;
- percent relationships;
- equivalent expressions through graph overlap;
- restrictions, piecewise functions, and rational expressions; and
- circle equations.
This is where Desmos becomes much more than a graphing screen. A table can become a scatterplot. A set of points can reveal a model. Two expressions can be compared across their domains. A shaded region can show every pair that satisfies a system of inequalities.
The important skill is still translation. You have to know what each row, variable, parameter, and restriction represents before the calculator output can mean anything.
Advanced: recover hidden information
The eight Advanced lessons teach you to design the model rather than copy it from the prompt.
You learn to:
- use custom regression to recover an unknown parameter;
- combine multiple independent conditions;
- parameterize points and test answer choices;
- apply factor, root, and remainder tests;
- isolate an expression hidden inside a system;
- work with exponential models, transformations, and Log Mode;
- use distance and midpoint relationships in circle geometry; and
- distinguish an exact fit from a best-fit estimate.
This is where shallow Desmos tricks usually break down. A regression can produce an equation for almost any table, but that does not mean the equation answers the problem.
For exact function values, the model must satisfy every stated condition. For measured data, a line or curve of best fit is an estimate and will usually miss some points. For some questions, regression is the wrong tool because it assigns one fitted value where the prompt asks for every possible solution.
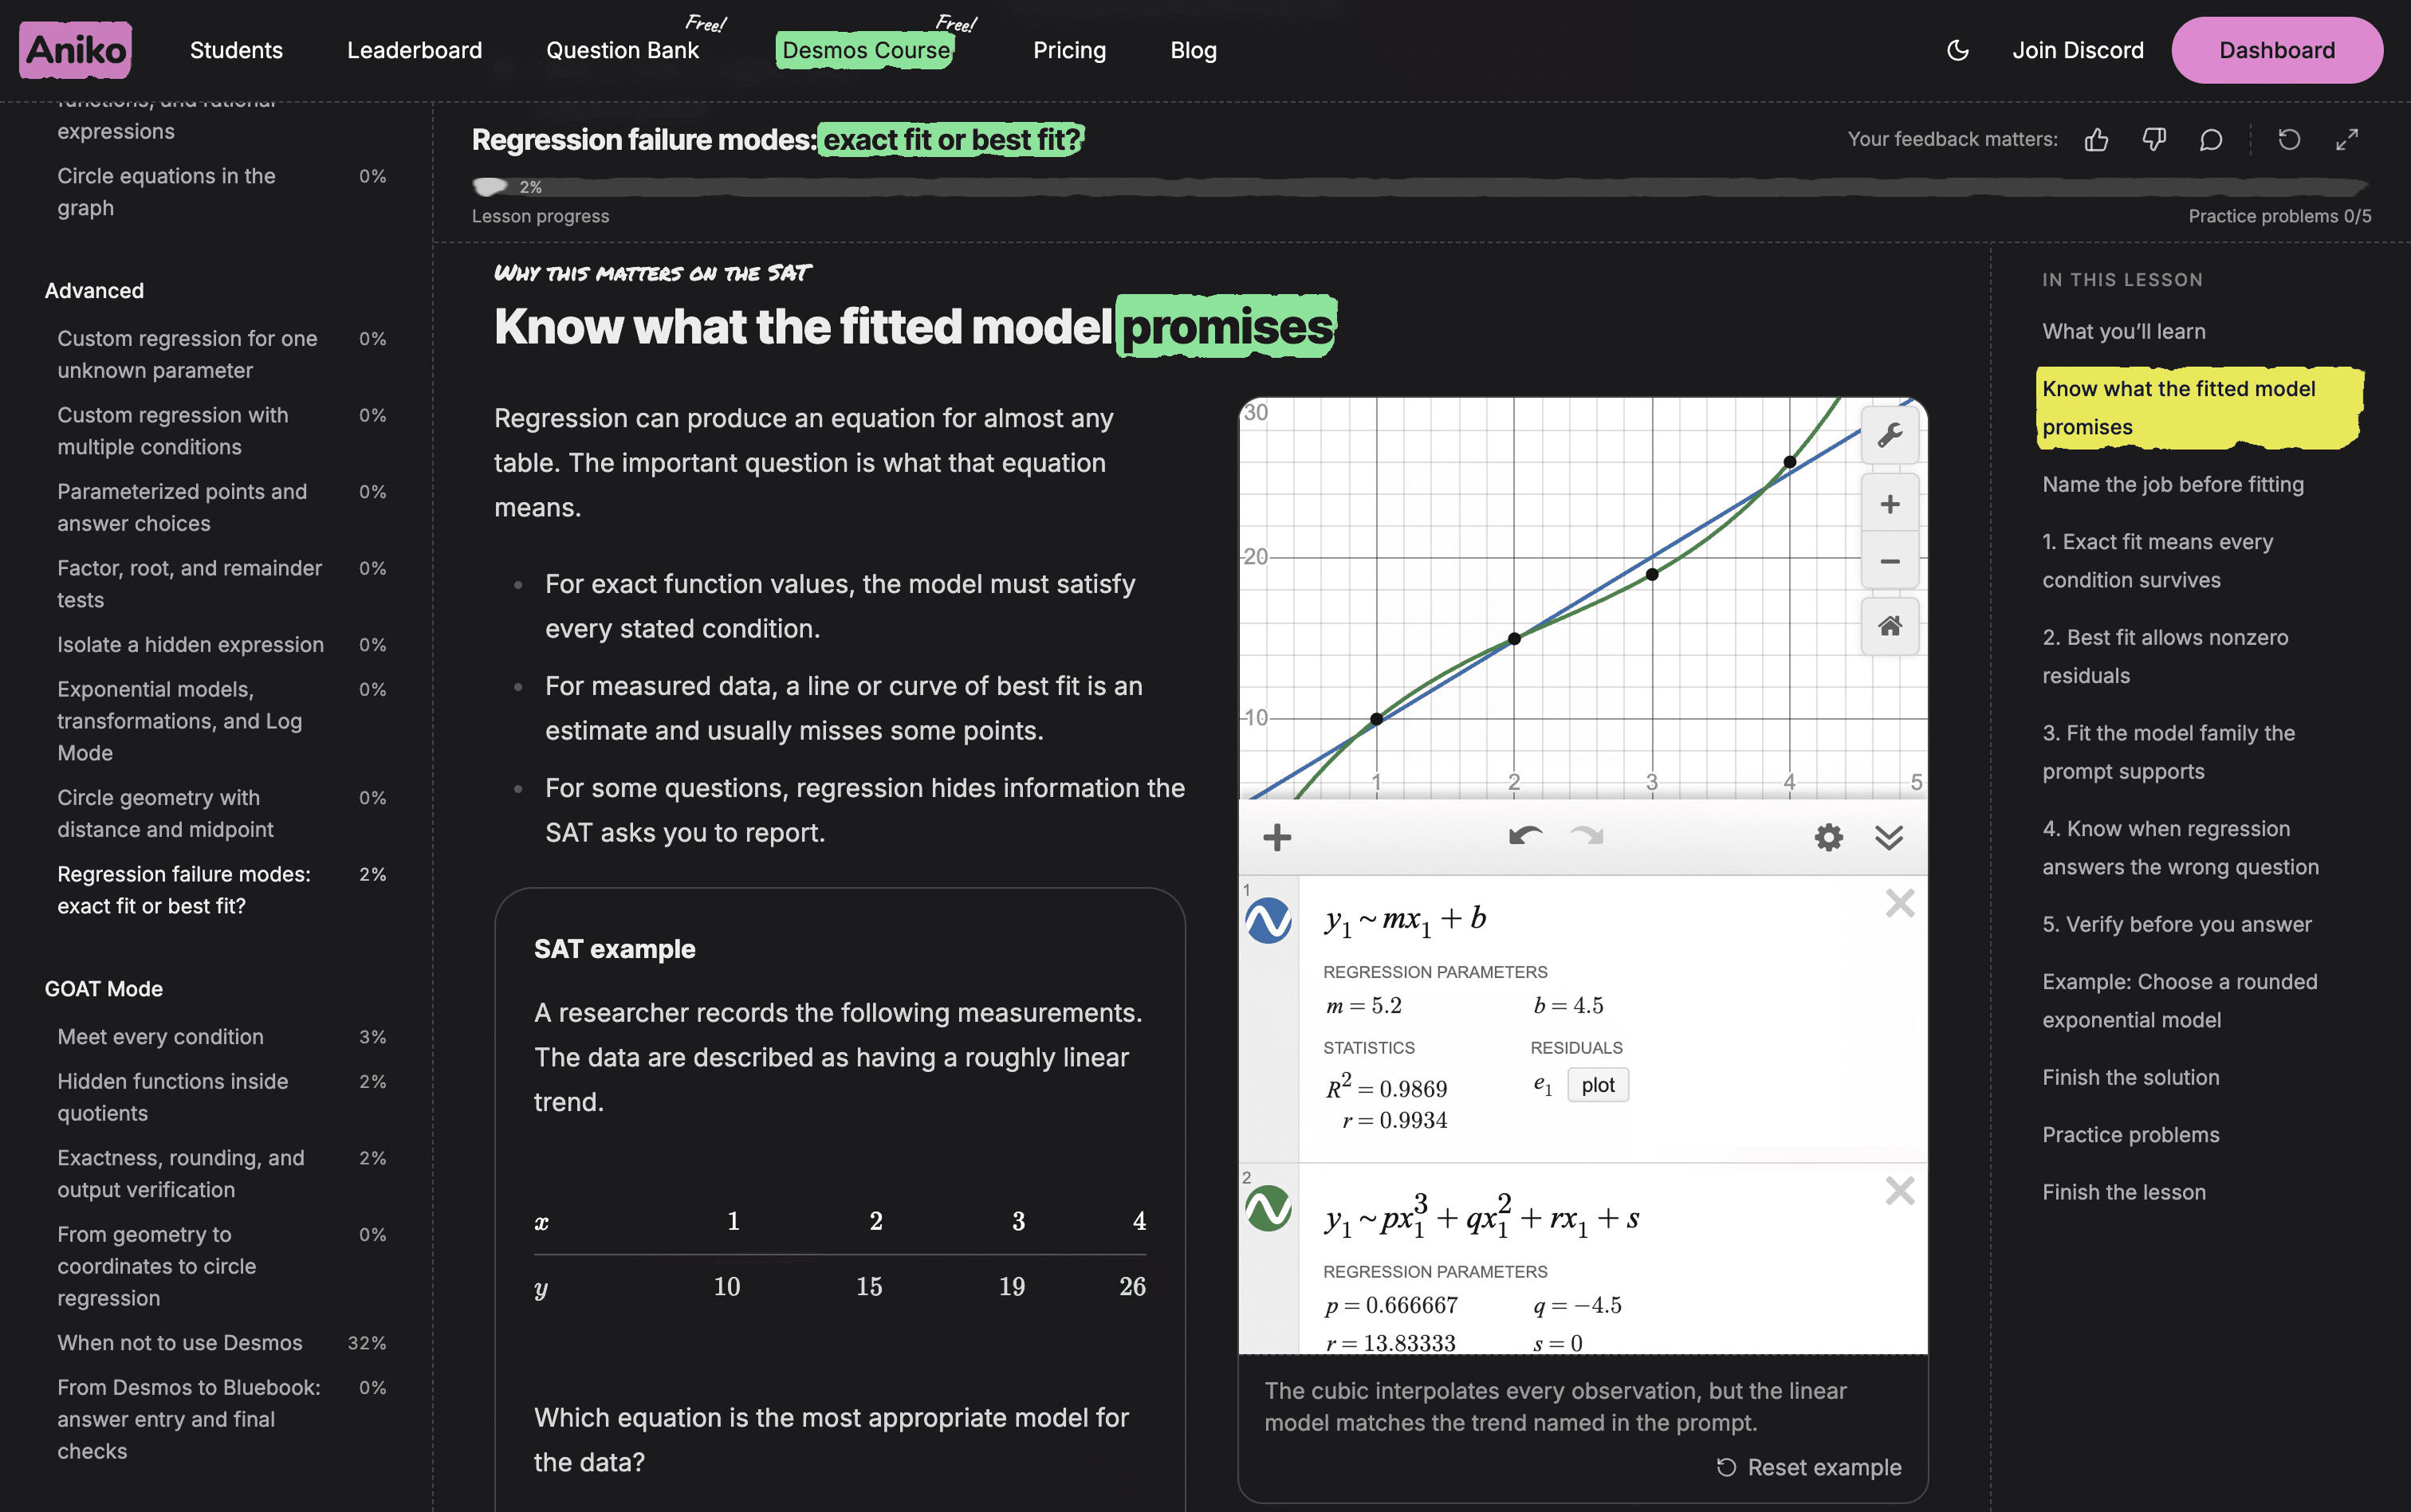
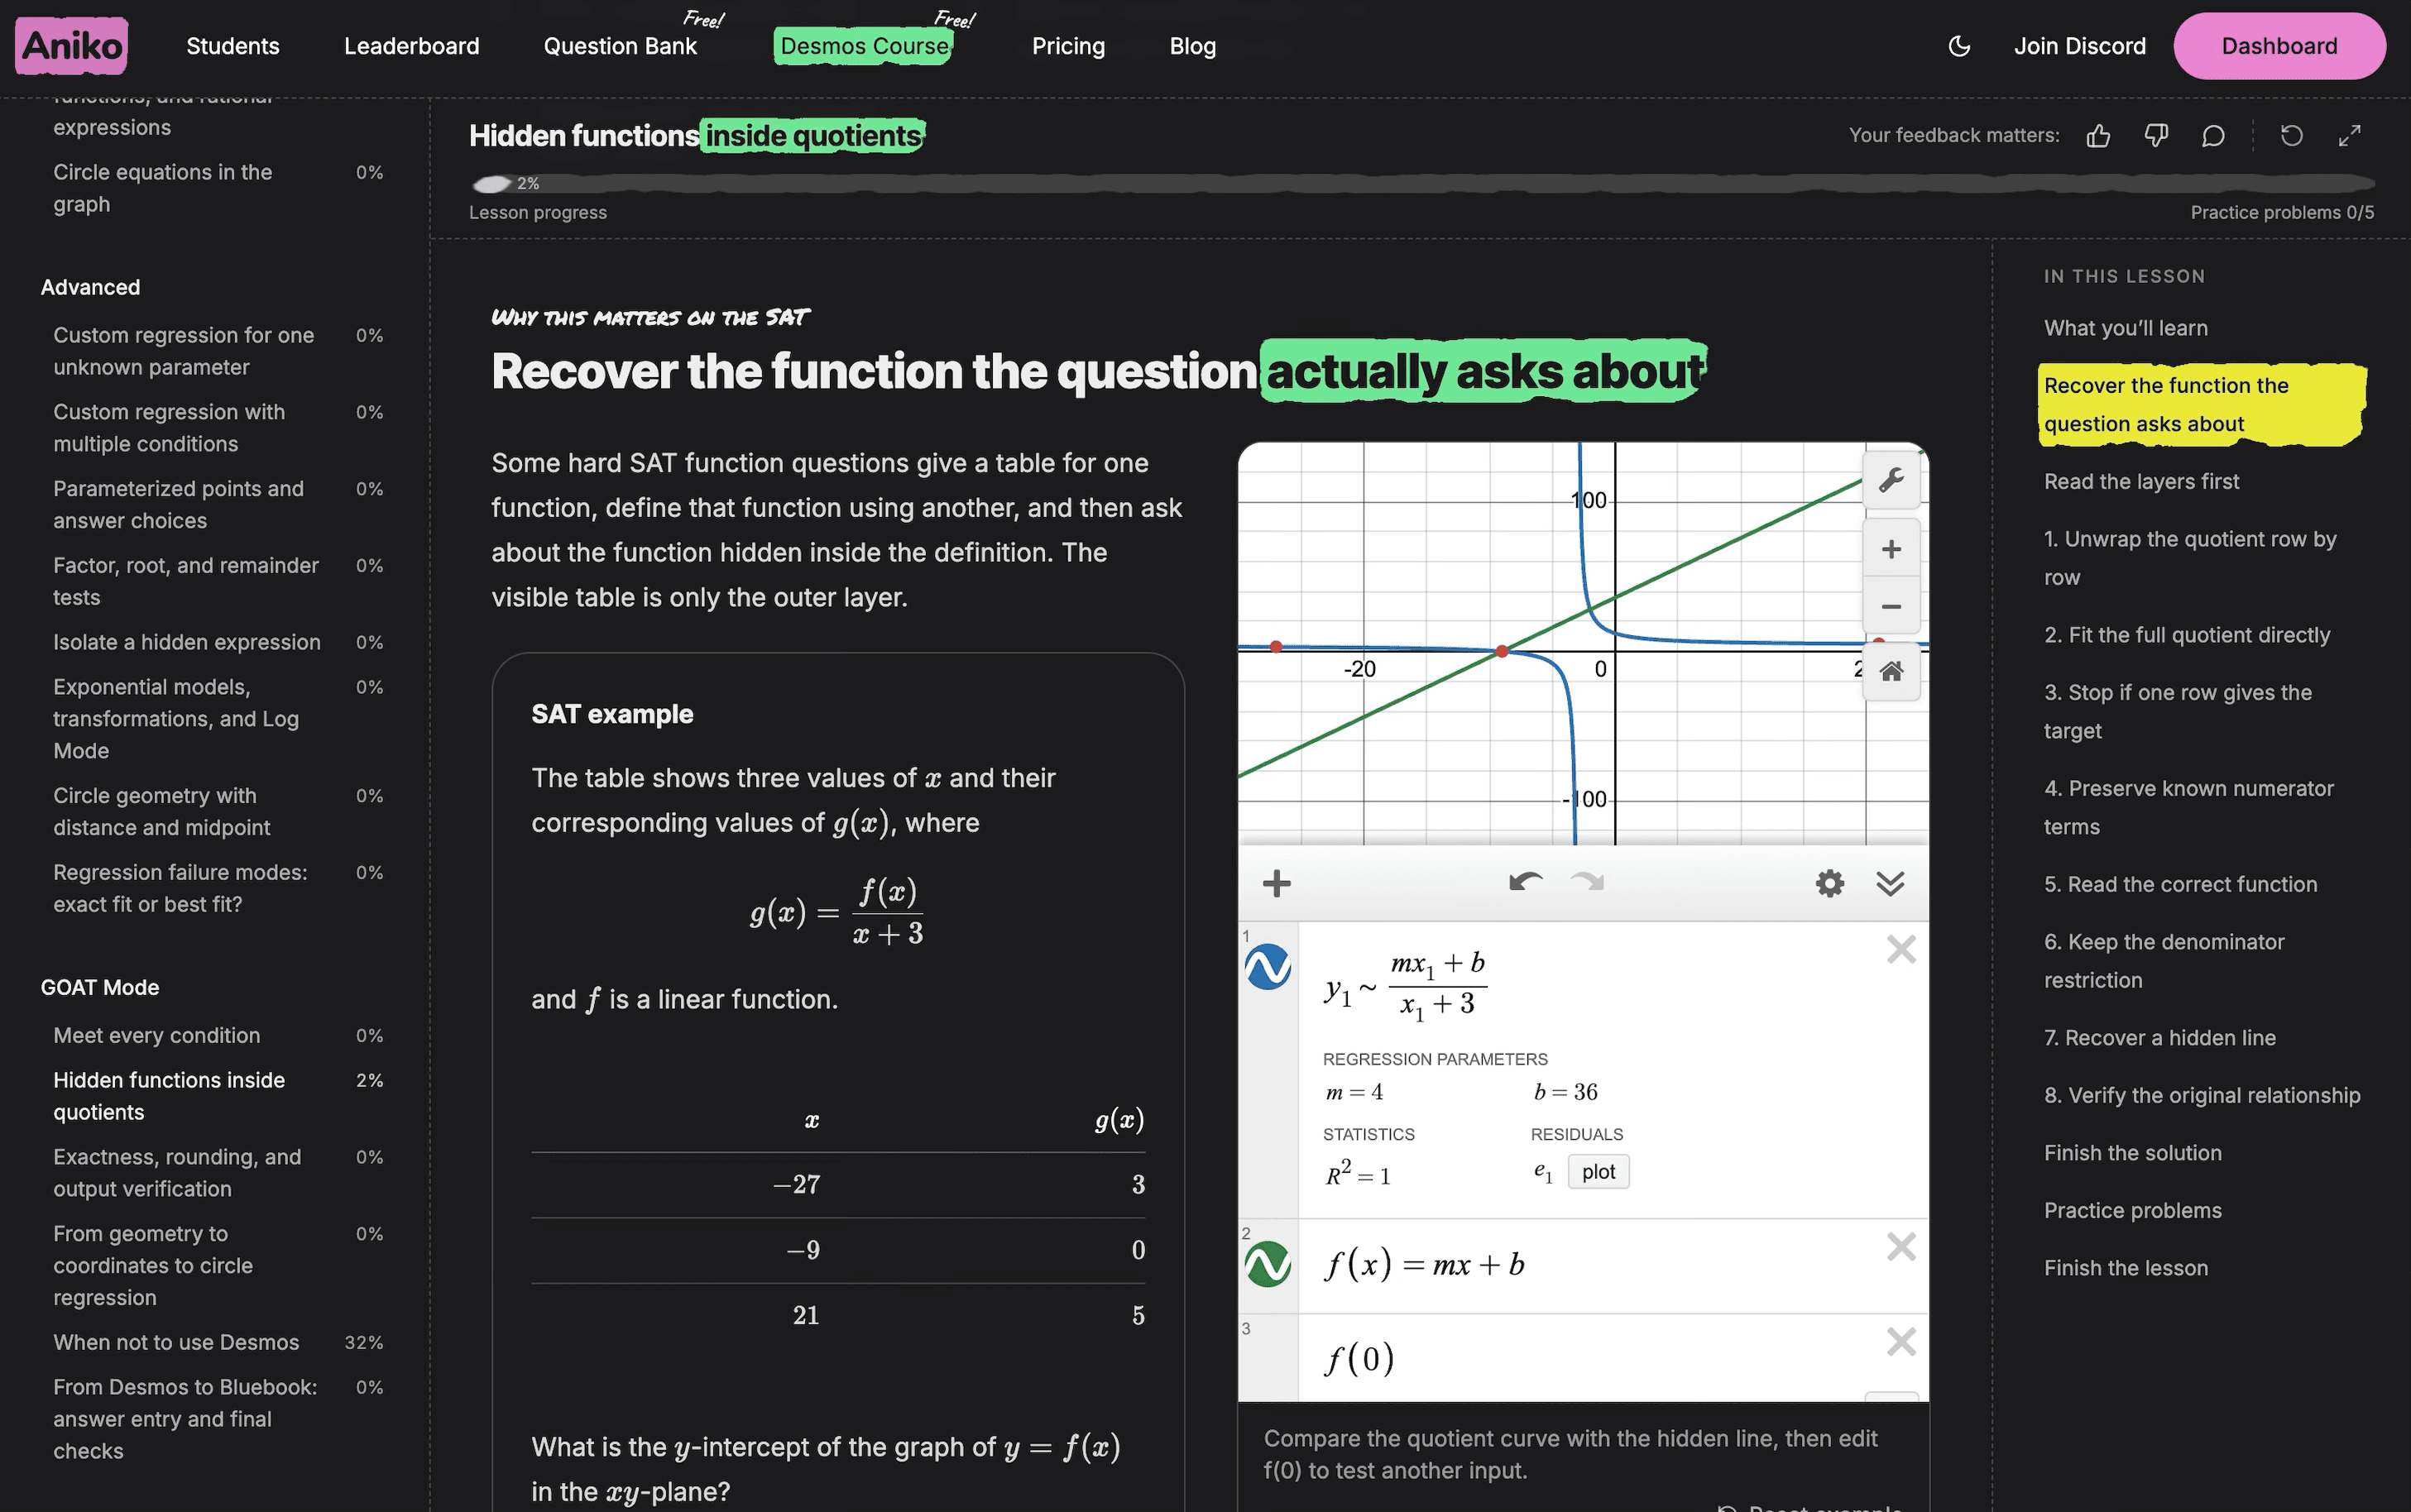
The Regression failure modes: exact fit or best fit? lesson is a good example of the course's approach. It does not only show how to run a regression. It teaches you to name the mathematical job first, choose the model family the prompt supports, and stop when regression is answering the wrong question.
GOAT Mode: choose and verify the complete solution
The final six lessons are not about decorative calculator features. They are about judgment.
You learn to:
- organize dense prompts into condition stacks;
- recover functions hidden inside other expressions;
- preserve exactness and apply rounding only when required;
- translate geometry into coordinates and circle regression when that route helps;
- decide between Desmos, a hand method, and a mixed approach; and
- turn calculator output into valid Bluebook answer entry.
One of the most important lessons in the entire course is When not to use Desmos.
Strong calculator users do not use Desmos more often simply because they can. They recognize when a requested expression is already a combination of the given equations. They notice when a geometry theorem finishes the problem immediately. They keep conceptual questions outside the calculator. They use Desmos as a backup when hand work becomes slow or fragile.
GOAT Mode is where the calculator stops being the strategy and becomes one tool inside a complete SAT solving strategy.
How to use the course effectively
You do not need a complicated schedule. You need to work actively enough that each setup becomes repeatable.
Use this loop:
1. Start with Lesson 1 unless the basics are effortless
Even experienced students lose points through parentheses, wrong coordinates, stale expressions, angle settings, and answer-entry mistakes. Lesson 1 is a useful calibration of those foundations.
If the basic workflows are already automatic, browse the complete lesson path and begin with a specific gap.
2. Predict before you calculate
Before changing the example, decide what you expect the graph, table, point, or parameter to show. A prediction gives you something to compare with the output and makes strange results easier to catch.
3. Recreate the setup yourself
Do not only watch the calculator. Enter the expression, build the table, select the point, and read the result. The physical sequence matters because that is what you will have to reproduce during the SAT.
4. Attempt the problem before opening the hint
Give yourself a real chance to choose the method. If you get stuck, use the hint for direction, then return to the setup instead of jumping straight to the explanation.
5. Explain why the answer is correct
After a correct submission, connect the output to the prompt:
- Why did this method apply?
- What does the result represent?
- Why is this the requested value?
- What mistake was the distractor or common error designed to trigger?
If you cannot answer those questions, the method is not yet reliable.
6. Transfer the technique to the Question Bank
Use the related skill links at the end of the lesson. Fresh questions prevent you from memorizing the shape of one example and show whether you can recognize the same workflow in a different form.
7. Move forward when the setup feels repeatable
Familiarity is not the goal. You should be able to see the recognition signal, build the setup cleanly, and explain the output without relying on the lesson's exact wording.
“During the Aniko plan, I realized that while those resources were helpful, I had missed out on a lot, such as using Desmos for some problems, which I'm glad Aniko included.”
His result came before this course launched, but the lesson is directly relevant. Desmos is easy to overlook when SAT preparation is organized only around mathematical topics. A dedicated progression makes the calculator workflows visible and gives students a place to practice them deliberately.
You can read Justin's complete SAT study story.
Why we built the Desmos course first
When we decided to build Aniko Courses, Desmos was the obvious place to begin.
The built-in calculator changes how students can approach questions across all four SAT Math domains. It can save a huge amount of time, but only when the student knows what to enter, what to read, and when another method is faster.
We wanted one coherent path from the first expression to the most advanced decisions. That meant more than publishing 30 explanations. Every lesson needed:
- a clear recognition signal;
- guidance on method choice;
- an interactive calculator at the point where it is needed;
- worked examples that expose both the setup and its mathematical meaning;
- practice that requires the student to finish the solution;
- hints without premature answer exposure;
- verified solutions and realistic common errors; and
- a bridge into fresh Question Bank practice.
The result is a technique-first course that still connects every workflow to the SAT skills where it appears. It uses the Graphing Calculator throughout because the same interface handles calculations, equations, graphs, tables, regressions, and points of interest.
The complete course is free and requires no registration. Progress is saved on your device, so you can leave a lesson and return to it later.
We also want the course to keep improving. Every lesson includes a Feedback button near the top-right corner. Tell us when an explanation can be clearer, when an interaction gets in your way, or what course you want us to build next. We read every suggestion.
For current calculator rules and testing behavior, you can also review the College Board calculator policy, the official SAT Desmos Graphing Calculator, and the Bluebook testing tools.
Start with one reliable workflow
You do not need to memorize 30 techniques before Desmos becomes useful.
Start with one reliable workflow. Open the first lesson, enter the mathematics exactly as written, and learn to read the result the SAT is actually asking for. Then prove the method on a fresh problem.
That is how calculator familiarity becomes calculator fluency. One correct setup, one complete answer, and one better decision at a time.
Free, no registration required